

When you’re opening a family entertainment center or updating your venue, installation in a children’s play area can feel overwhelming. You might worry about the cost, the time it will take, or whether you can do it right without professional help. But with the right guidance and resources, installing an indoor playground can be a smooth process. Whether you choose to have professionals install it or decide to do it yourself, once you understand the steps involved, it will alleviate your fears and ensure a successful setup.
In general, there are two ways to install an indoor playground: installation by our professional installation team or self-installation by our clients.
Two Installation Options: Professional Installation VS. Self-Installation
1. Installation by Our Professional Team
By hiring our professional installation team, you can ensure that installation in a children’s play area is quickly and correctly, minimizing downtime for your business. When you have professionals handle the indoor playground installation, you can be confident that every component is installed in accordance with safety standards and manufacturer specifications. Our installers have experience installing all types of play structures and can handle even the most complex designs. You will need to pay for their salary ($150/person per day), round-trip airfare, lodging, food, and daily transportation.
While this option may require a larger investment upfront, it ensures a hassle-free installation process, allowing you to focus on other aspects of your business.
2. Self-Installation by Our Clients
If the cost of professional installation exceeds your budget, or you prefer to install it yourself, we’ll provide all the support you need to make it happen. We’ll send you a comprehensive installation guide and reference photos or videos to help you every step of the way. And before delivery, we will perform a trail installation to ensure that every part is all right.
By installing it yourself, you can save on labor and travel expenses and work at your own pace. This is a great option for those who like to do things themselves and have a team of people who are ready to tackle the project.
Step-by-Step Guide for Self-Installation
Step 1. Preparing for Installation
- Check the goods against the detailed packing list, and begin the installation after you’ve verified that all the products are correct and complete (if the list and products are not right, call your salesperson immediately)
- Clean the area where the playground will be installed.
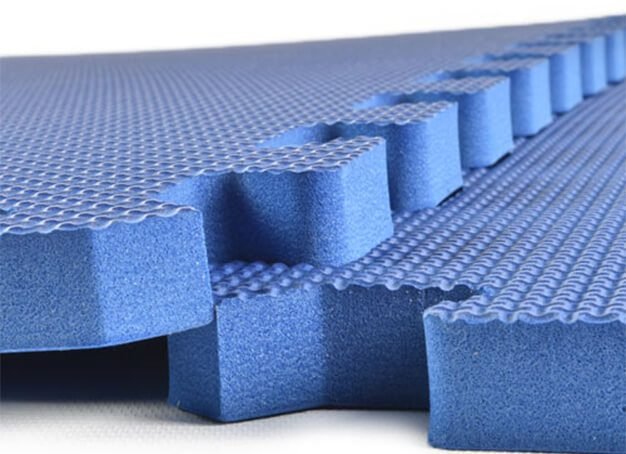
Step 2. Spread the Floor Mat
Start by preparing the base for your playground. Lay the floor mat out evenly across the designated play area. This mat is a cushioned surface that adds safety and comfort for children as they play. There are a few grooves on each side of mat. It helps you to cover the EVA flooring mat the entire area and is secured in place so it doesn’t move when children play.
Or you can check out this video shot by Greatmats:
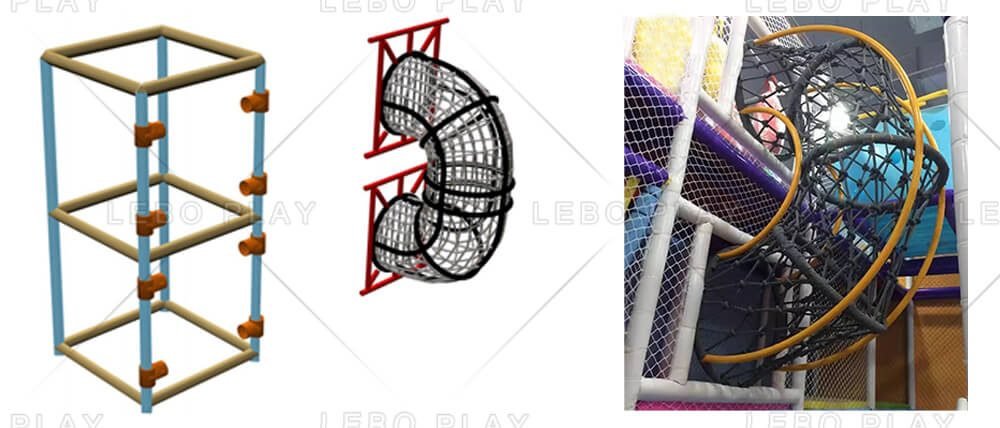
Step 3. Assemble the Frame
Next, assembly the frame for your playground according to the instructions provided. The frame is the backbone of your playground, so it’s important to follow the instructions carefully.
Do the installation one floor by one floor, (first floor, second floor…).
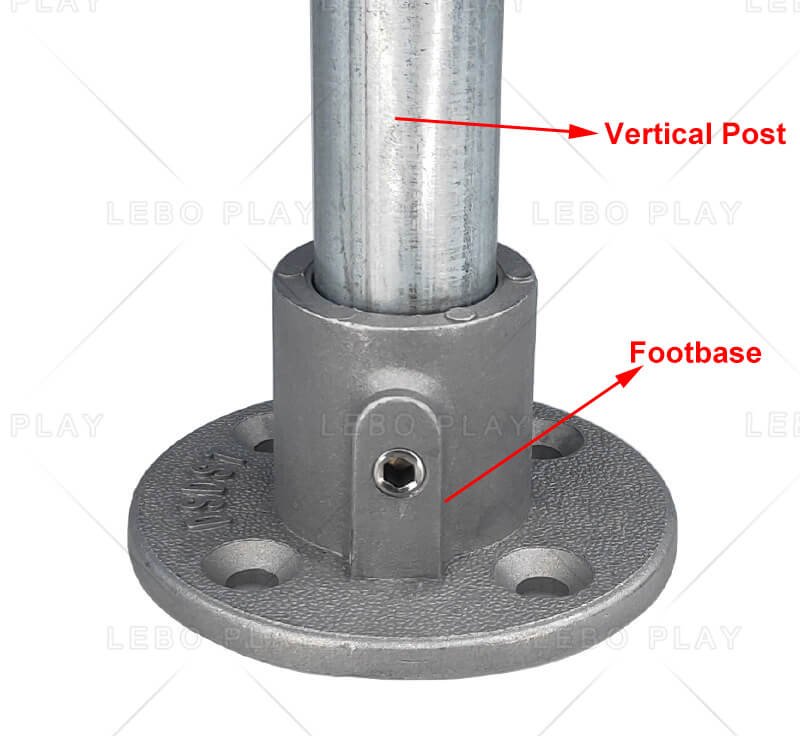
- 1. Start with the vertical posts in the corners. We color-coded the pipes in the installation guide, so you can find all the vertical pipes by color and length.
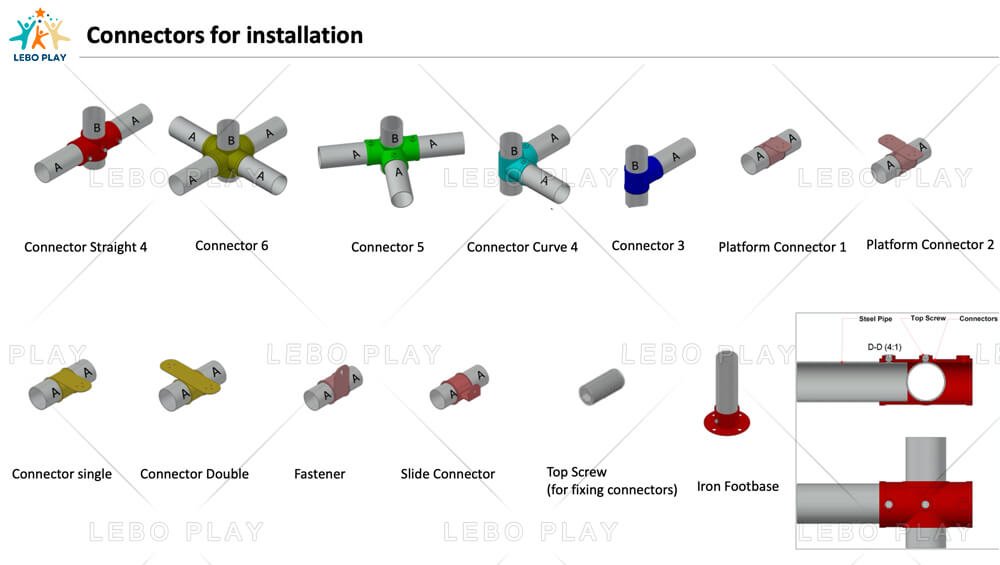
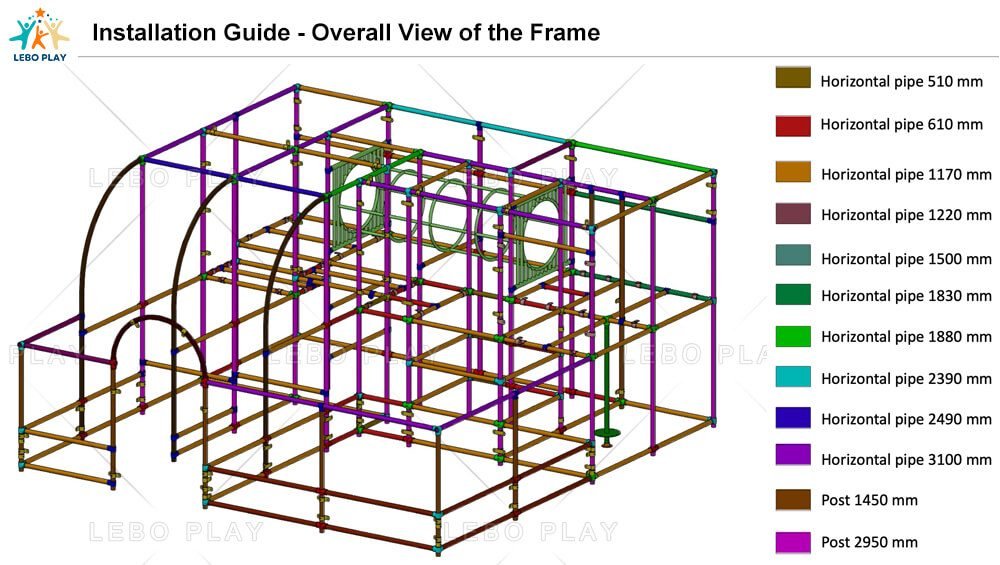
- You need to put each pipe in the foot base and put all the connectors on the upright pipes before you put the horizontal pipes on. You should leave a 10cm gap from the upright pipes in the corners to the wall.
- Next, connect the upright pipes with the horizontal pipes that have the connectors on them in the correct place according to the drawings. Finally, build the frame in order this way.
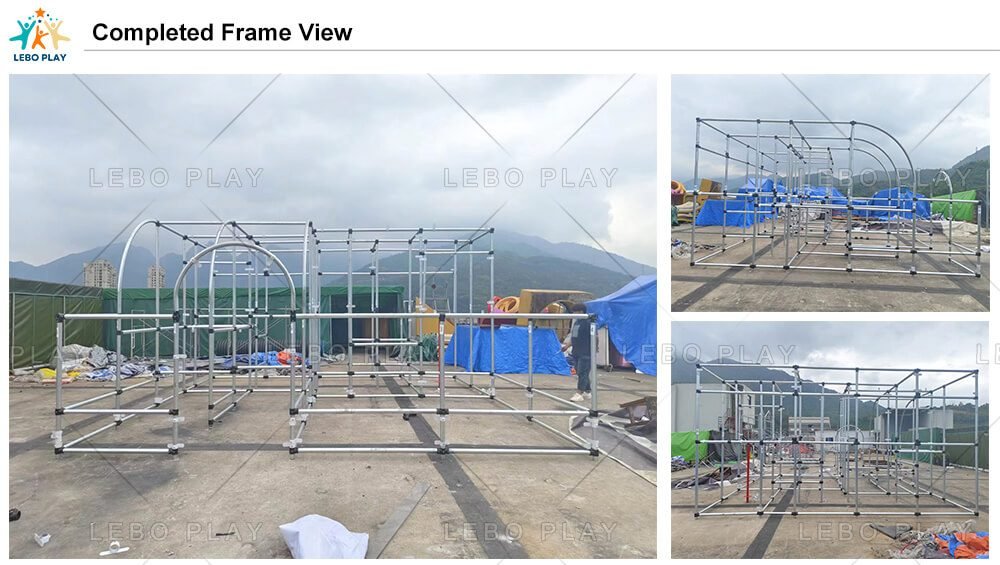
It’s important to follow the layout plan accurately to avoid any misalignments that could affect the overall stability of the playground. Double-check that the frame is stable before you move on to the next step.
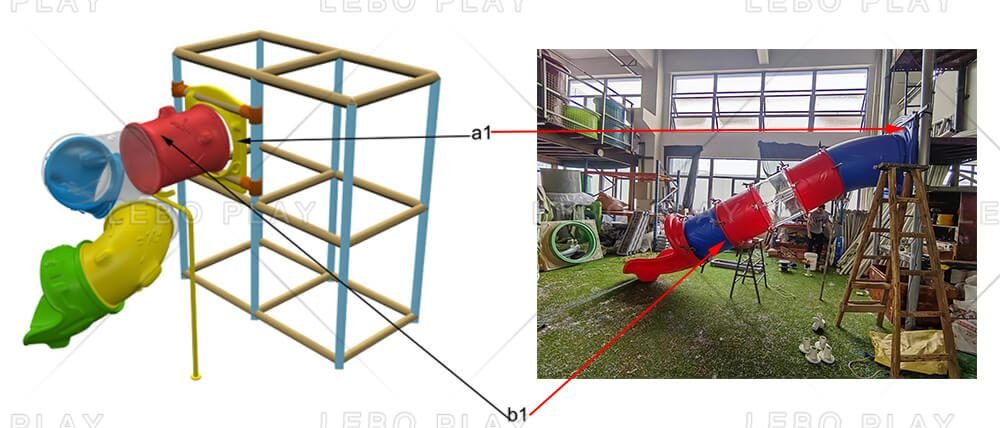
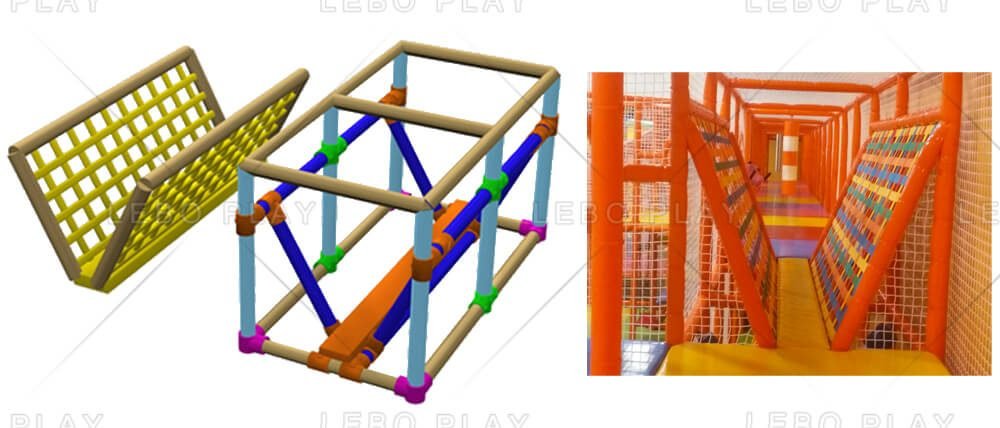
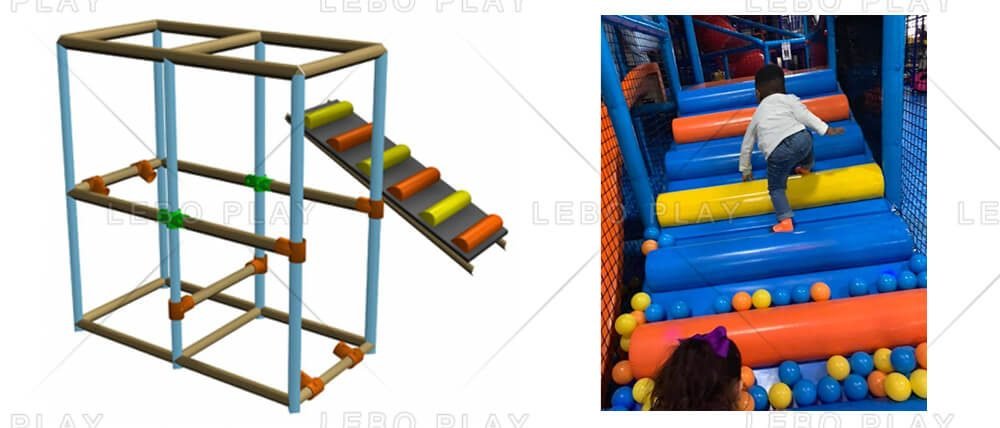
Step 4. Assemble the Components
Once the frame is in place, it’s time to ssemble the various play components. These components might include slides, ball pits, horizontal net tubes, and other play equipment. Each component should be installed according to the specific instructions provided in the guide. Pay close attention to where it attaches and make sure all the connectors and screws are tight. This step might require some extra hands, so get your team to help you.
- Plastic Slides
- Single-plank Bridge
- Rainbow Bridge
- Net Climbing
For more details, please contact our sales representative.
Step 5. Pull Up the Protection Net
After you have put together everything except the platform, you need to pull up the protection net. Before you start, you need to organize the string. To fix the safety net, you need to install it on the side next to the wall first. Then spread the net around the outside of frame to the other side. Start to fix the net in the upper corner. Wind the net on the post by string to another corner. Wind the net on the post by string. You should fix the corner with knot, and you can feel it’s hard to pull the net on the end. Once the corner net is fixed, please fix the bottom part of net every 2 meters. In case the net couldn’t be pulled down or it’s not neatly. This net acts as a barrier to keep kids within the safe confines of the indoor playground.
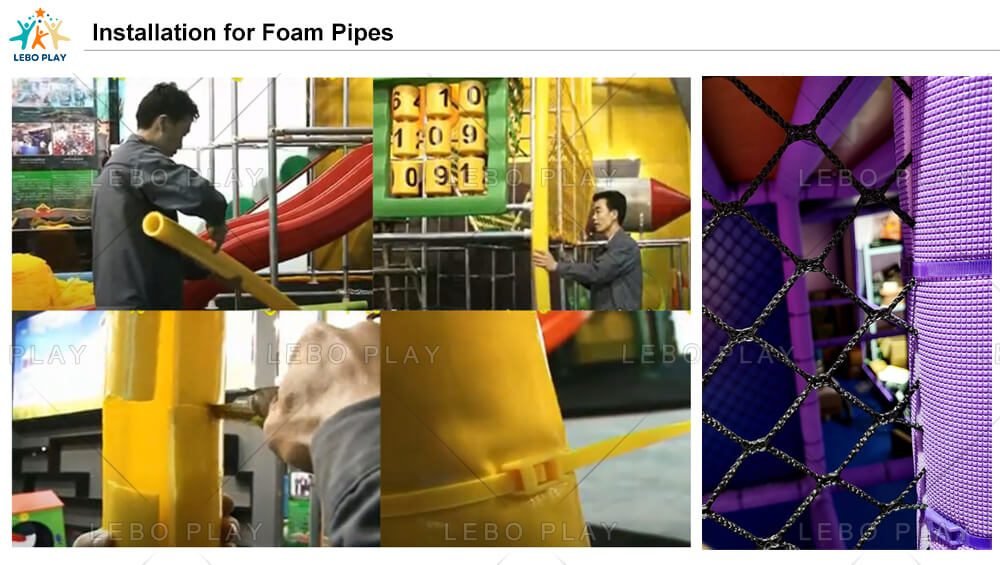
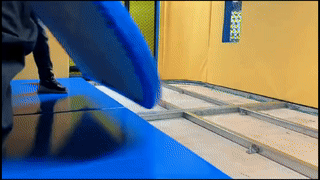
Step 6. Cover the Steel Pipes with Foam Pipes and Cable Ties
To further enhance safety, cover the exposed steel pipes with foam pipes and zip ties. Cut the foam pipes down the seam with a knife. Be careful not to cut the other side or your hand. Put the foam pipes on the post and cut the places you need to cut. And you’ll need to cut the foam on the inside to make it fit the post perfectly. Secure the foam pipes with zip ties. Don’t make the zipe ties too tight. This step adds an extra layer of protection, making the playground safer for children.
Step 7. Spread the Platform Inside the Playground
The next step is to put the platform inside the playground structure. This is where the kids will spend most of their time playing, so you need to make sure it’s installed right. Make sure the platform is level and securely attached to the frame. Depending on the design of your playground, the platform may be made up of multiple sections that need to fit together perfectly.
Step 8. Installation Completed
Congratulations! You have now installed your kids indoor playground. Before you open it to the public, make sure you go through a complete check to make sure everything is tight and the playground is safe. Let a few of your team members play on it and interact with the equipment to make sure everything is working like it’s supposed to.
Conclusion
Installation in a children’s play area can be a challenging yet fulfilling project. Whether you decide to have it installed by professionals or you decide to do it yourself, it’s important to follow the steps to make sure the playground is safe and fun. By spreading the floor mat, assembling the frame, attaching components, pulling up the protection net, covering the foam pipes on the steel pipes and spreading the platform, you can turn your space into a fun playground that kids and parents will love.
At Lebo Play, we are committed to providing high-quality indoor playground equipment that meets strict safety standards. No matter where you are, our indoor playground equipment is designed to bring joy and excitement to children all over the world. We hope this guide has been helpful and we look forward to helping you create a fantastic play area for your business. If you have any questions or need help, please don’t hesitate to get in touch with us. Happy installing!